Hello Everyone,
it is me again back with another DIY, this time using my beloved Cricut Joy. In this blog post, I am going to show you how to decorate some candles and give them a very elegant look for your Advent Wreath or Candles Holder.
We are coming closer to Christmas and I know that many of you are still decorating their homes, so I thought to help with a little of inspiration.
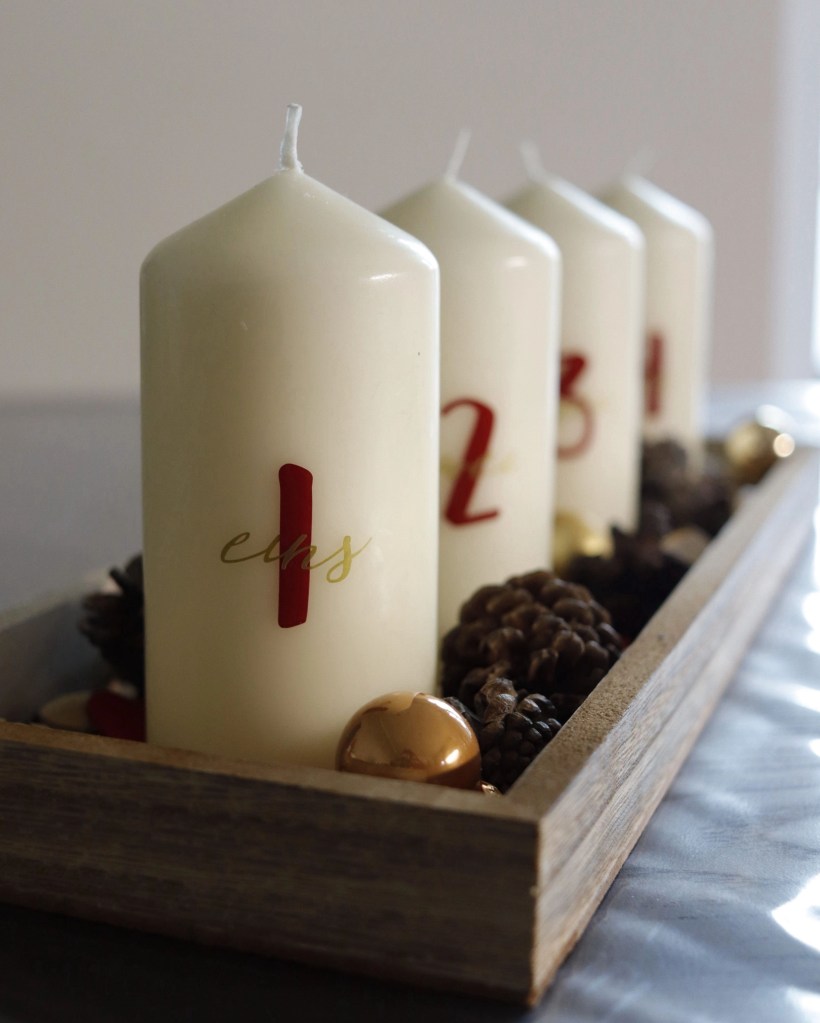
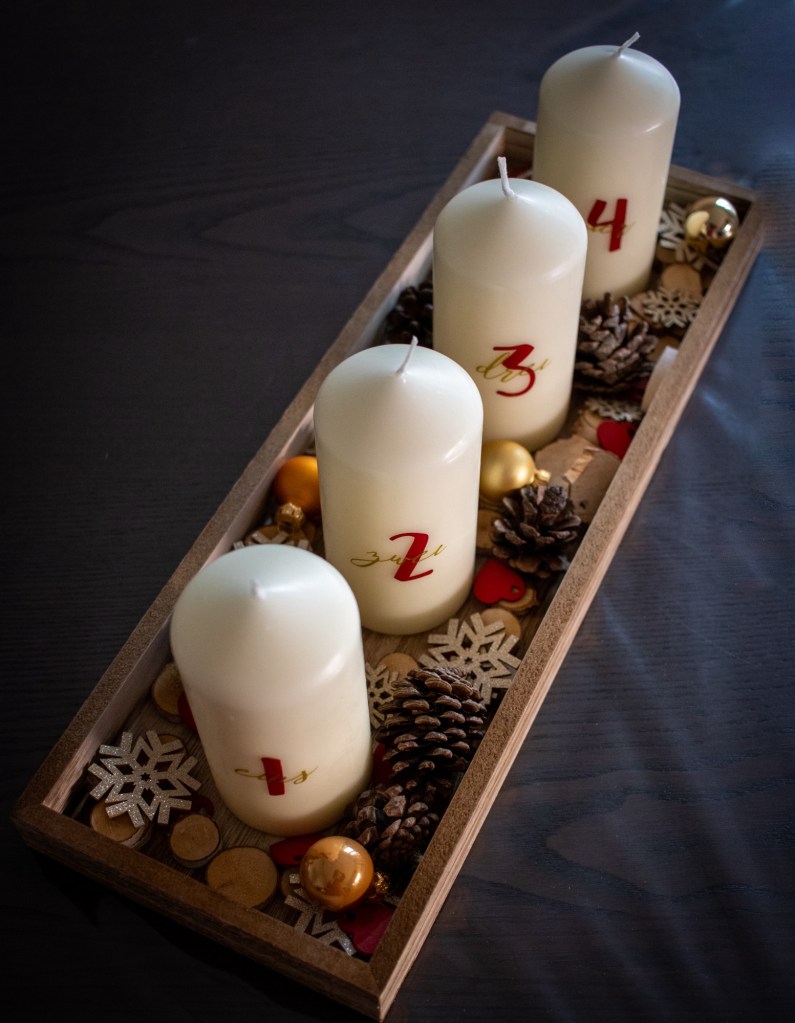
One of the first decorations my family and I made for Christmas was this rustic composition with candles to count the Sundays to Christmas. I knew I wanted something classy and elegant so I undusted my Cricut Joy for this super easy and fast project.
I swear you will find many ideas on the web on how to decorate Christmas candles but no one is so easy and fast to make as this one.
Many DIY-projects are absolutely not safe for burning candles for their materials’ choice, so I had to come up with a solution which still allows me to light up those candles every Sunday.
I first decided to engrave the candles and decorate them with some glitter, but the engraving tip of my pen got waxy and was very hard to clean. Moreover, if you decorate your candles with glitter, glue will not stick to wax and you will need to use double-sided adhesive tape.
If you want your candles to be more than simple decorations, you need to choose materials which are safe to burn. This excludes glitter, glue and tape but using vinyl foil allows me to achieve the goal.
Vinyl is a material which can whit-stand high temperature and does not burn but melt in the wax. If you couple it with candles made of paraffin wax, you obtain the perfect combo. These candles melt the wax from the center, making sure the vinyl foil on their surface does not get in touch with the flame.
But now the part you were all waiting for…
Here is the Design Space project I created. It is publicly available and I have made a german and english version. Both are free to make and you will not need any Cricut Access subscription, since the fonts used are free for all users.
What you need for this project:
- 4 paraffin-wax candles
- red vinyl foil
- gold vinyl foil
- transfer tape
- a ruler
- (of course) a plotter machine.
Follow these steps:
- Head via the link to Design Space.
- Press the button “customize” and delete or hide the layers which are not needed. i.e. You want to make the english version, delete/hide the german layers in the menu.
- Once you are ready click on “make it” and select which loading method you will use. Remember to use “without mat” for smart materials.
- Weed your vinyl pieces after the cut and use some transfer tape with a grid to align both design.
- Using a ruler, identify a point at a middle height on your candles where you will transfer your design.
- Place your transfer tape with the design on the candle and with the help of a scraper, press firmly on the tape and allow the vinyl to adhere on the wax.
And done! You have made your customized Advents candles.

If you try this project, make sure to like it in Design Space and follow me. It takes less than 10 seconds of your time but will just make my day.
I am committed to share more and more project with you in the following days and this is a good way to not miss any update.
Type in the comment what you think of this project and share your impression with me. I am curious to see which color combination you will choose for your Wreath or Candle Holder. Happy Crafting!
Sending lots of love,
Lalla
