Hello everyone,
I hope your week started amazingly. Mine had not the best start but is improving 😉. I am realising how difficult it is to constantly create new content for this blog having a toddler.
He is constantly seeking my attention, which I absolutely love but it is taking most of my energy. Therefore, I am starting to take advantage of his nap time to write down my thoughts here.
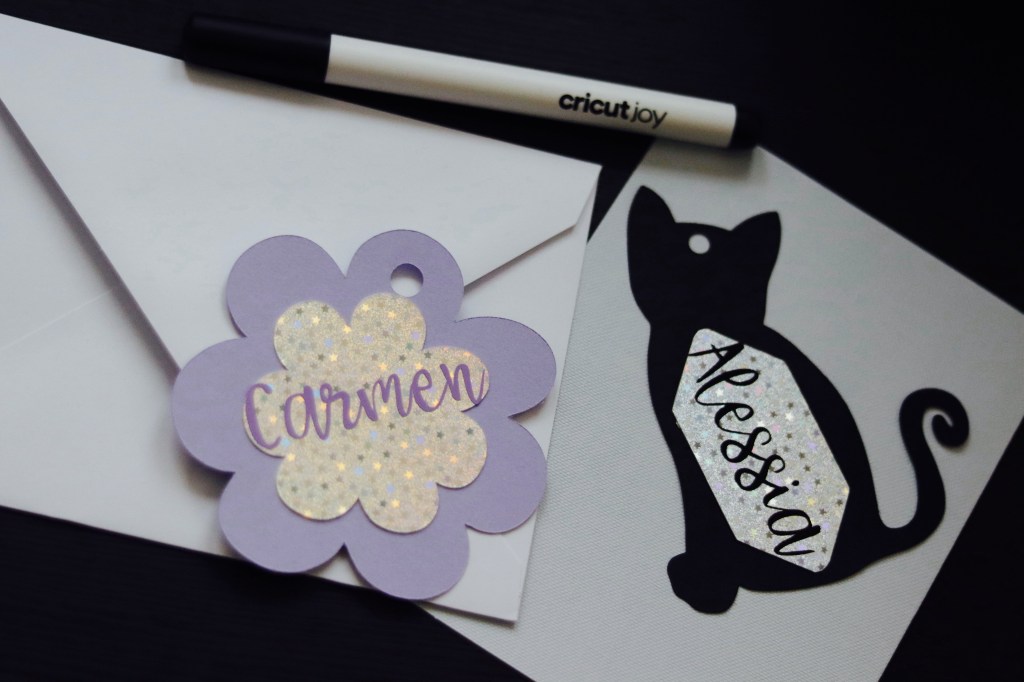
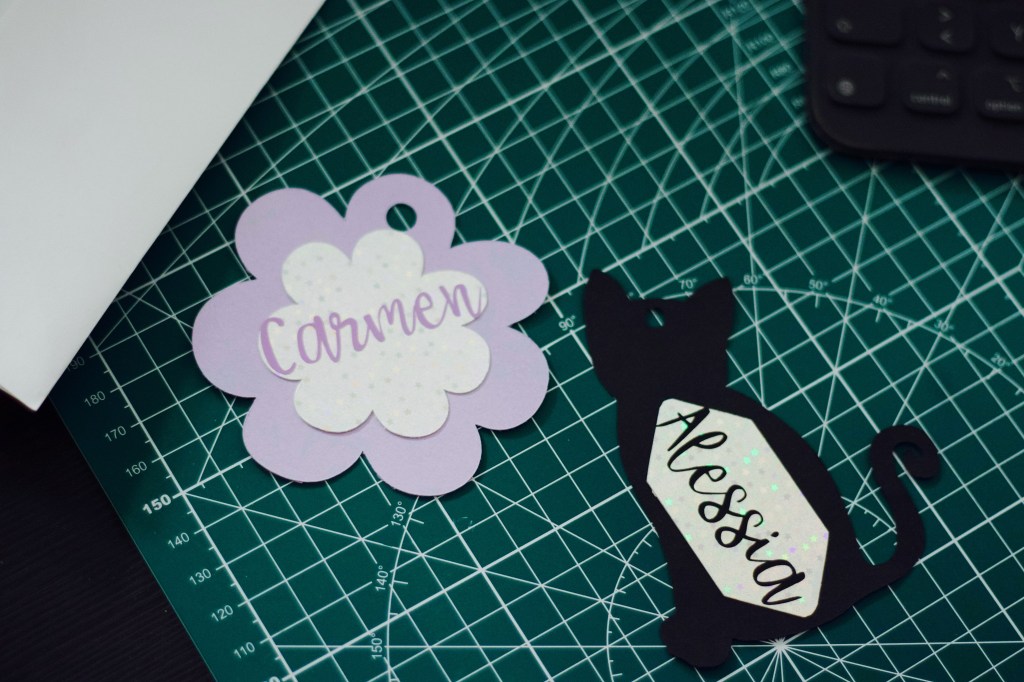
For this second part in my toddler’s birthday project, I am showing you how I created these cute customised gift tags.
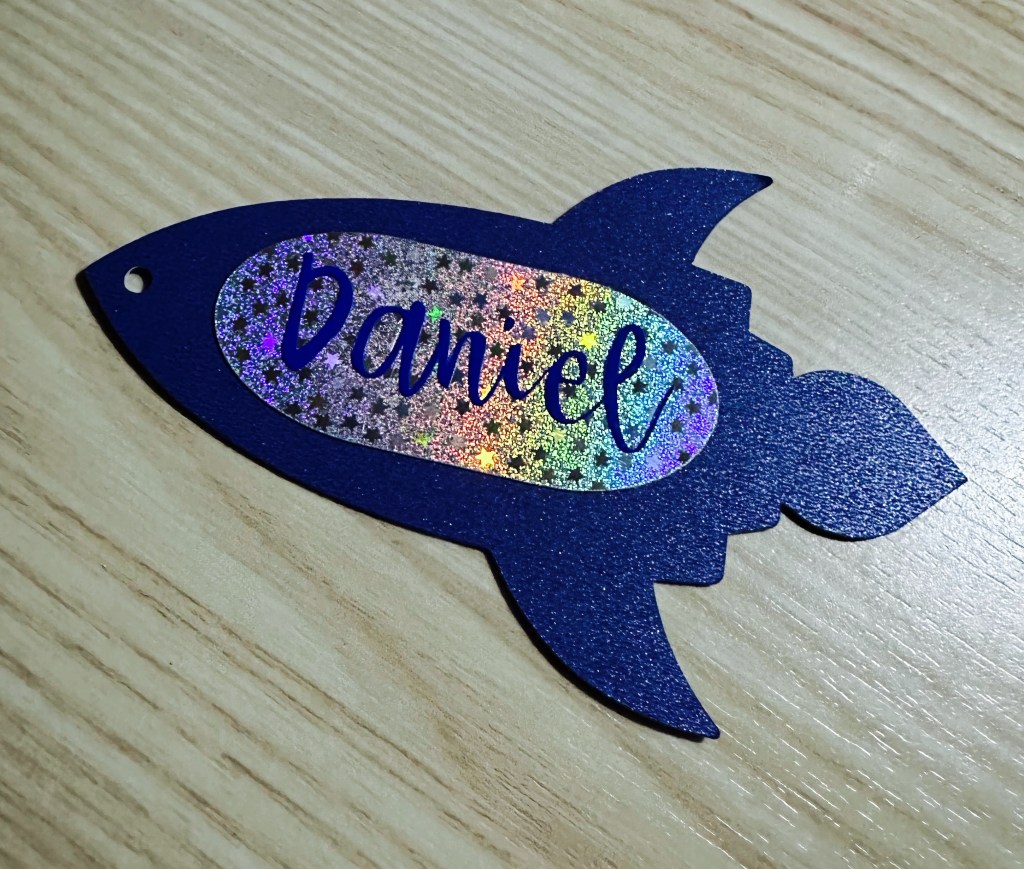
July was a month packed with several celebrations for my family: Name day celebrations and Daniel’s Birthday were packed in three days of the same week. To give a unique touch to the many gifts purchased, I thought why not investing the last bit of energy and make funny gift tags.
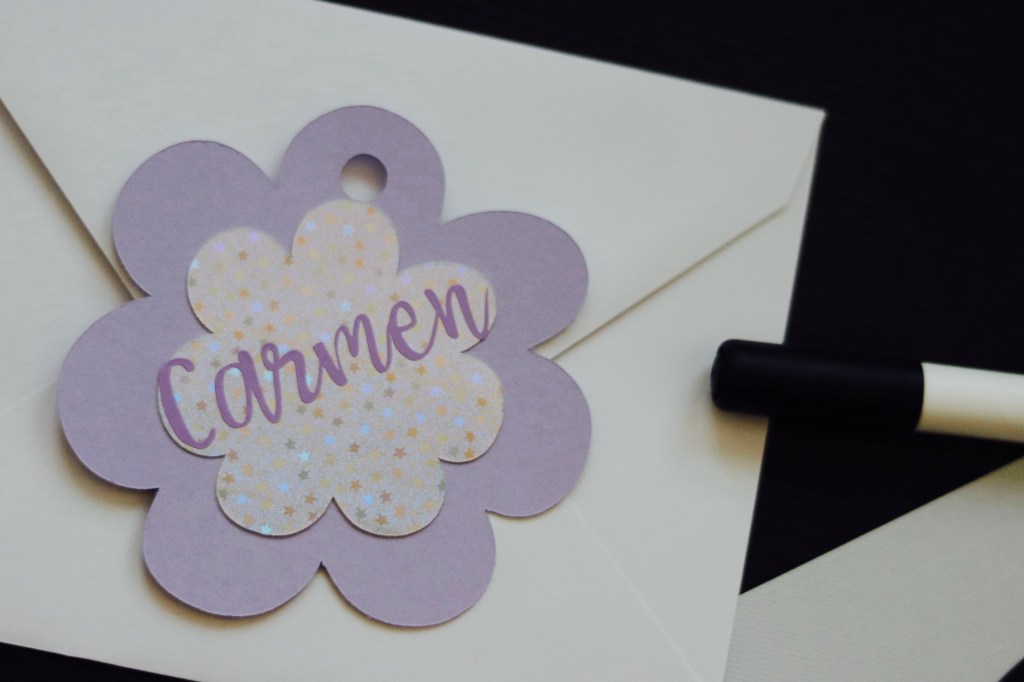
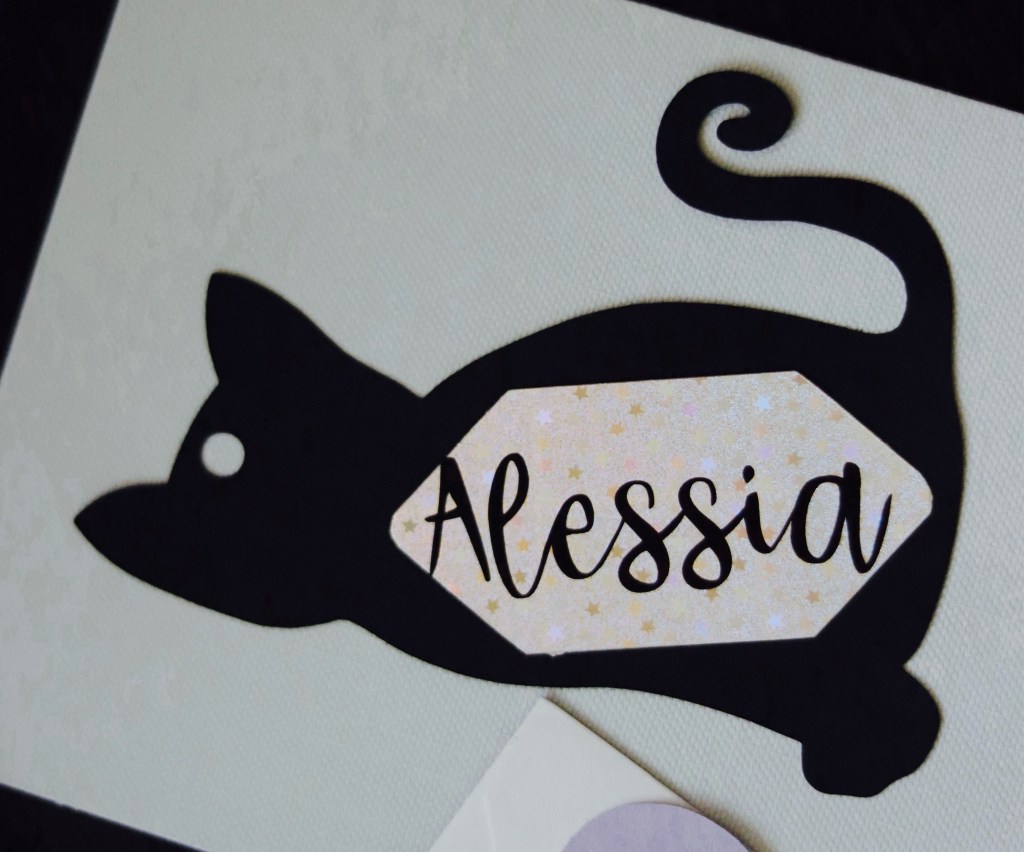
Based on what each family member likes most, I chose a shape for the tag, cut some paper of the desired color and used a shiny cardstock for the name background. Names are cut out from vinyl of the same color as the tag and voilá, Customised Gift Tags. So easy and funny to make.
The Cricut Joy speeds up the process so this project took less than a couple of minutes for the setup in Design Space, bringing the overall making-time to approximately 5 minutes in total.
Here is how to make the flower gift tag in Design space, step by step (same process applies to the Rocket and the Cat gift tag).
- Define a theme for your tag. Auntie Carmen loves botanicals and especially Mauve flowers (both its color and shape), so I started the project from a basic flower shape in Design Space.
- Choose the dimensions for your tag and set this as your shape size in Design Space by adjusting the proportions on the canvas. I wanted something big to accomodate the name in a readable way, therefore I resized the flower to fit in a square of 9.5 x 9.5 cm.
- Now we need to create a hole in the shape to fit some string and secure the tag on the wrapped gift. We have here two option: punching a hole in the tag with a cutter or let the Cricut Joy make the hole for you. To create it, in Design Space select a basic round shape, adjust the size, attach it in place and use the action “slice” to cut out the hole from the basic shape.
REMEMBER: delete the slice result from the canvas in Design Space or hide this layer, so the Cricut Joy will not cut this as an additional part of your project. - Select now a background shape for the name, resize and group it to the basic shape. Select a different color for this shape in Design Space to make sure you can cut the two parts in different steps when prompted by the software.
TIP: choosing different color in Design Space for each part of your project helps you to visualise the final product of your creative flow. - Let’s now create our name. First we choose a font using the Text function in Design Space. Resize the font to fit the name on the cardstock background and you are done. We have now our final design and we can proceed to the fun part. I choose the font “Babette” available to Cricut Access subscribers in Design Space.
Let’s bring gift wrapping to the next level by investing some extra time for making cute gift tags. Your friends, family and relatives will love the personalised touch. And you don’t need to be an extraordinary creative mind or excellent designer. Keep it simple and you’ll definitely love this process.
I see how this easy project could make fantastic faux leather bag charms or luggage tag.
Leave me a comment and let me know your thoughts.
Sending lots of love,
Lalla
