Hello everyone,
and welcome back to my blog. Today, I want to show you how easy it is to make your first HTV project.

On the weekend, I like to browse the web in search for inspiration.
This time the bell rings after watching an old workshop from Cricut, and told myself “let’s make a personalized notebook”.
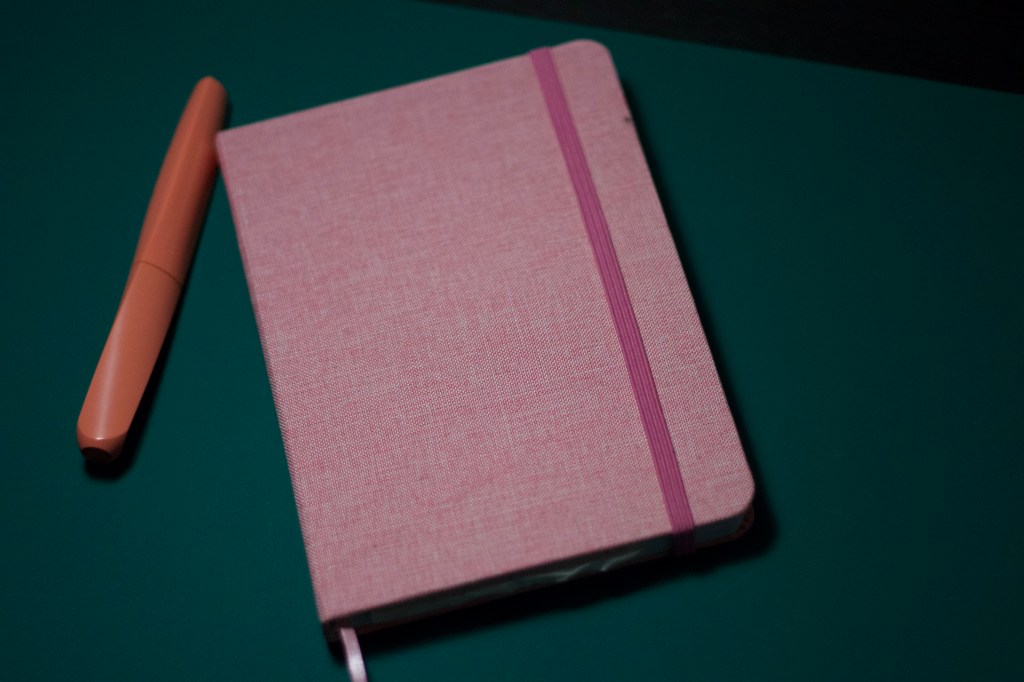
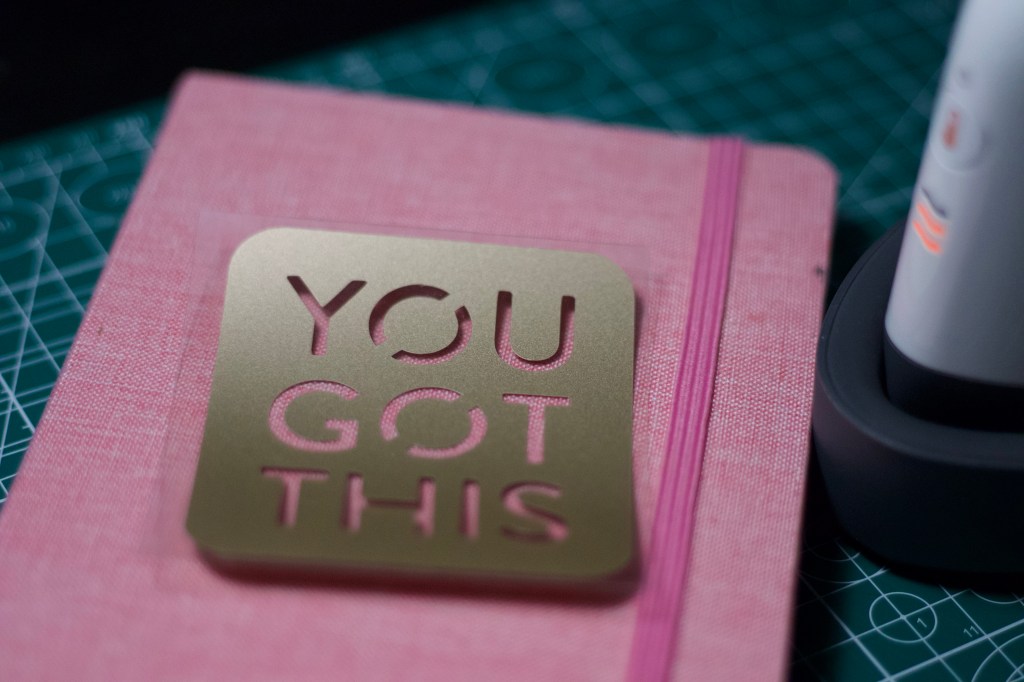
Few days after welcoming my son Daniel in this world, my mother gave me this pink A5 notebook to document the joy and challenges of motherhood. I found it really cute and has a cover made of fabric, nice to the touch.
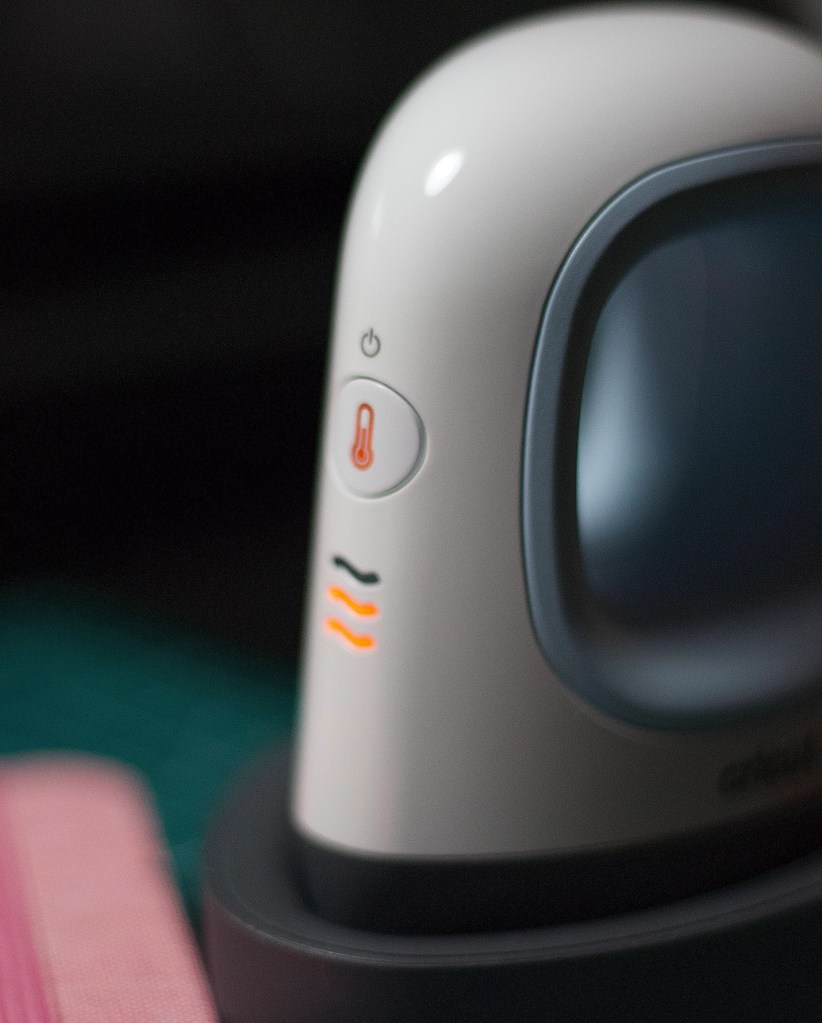
I wanted something inspirational to decorate this cover so I searched Design Space for a free design and found the “YOU GOT THIS” image (#M211778D9). I think it is perfect for this notebook and since the cover is made of fabric, I decide to go for an Iron-On project and use my brand new Cricut EasyPress mini.

First, I connected my Cricut joy and chose the material I wanted to use for the project. I went for a golden HTV. Measured the area of the front cover, I pick the size for my design and make sure to update it in Design Space software.
For this notebook, 7 x 8 cm for the design are perfect.
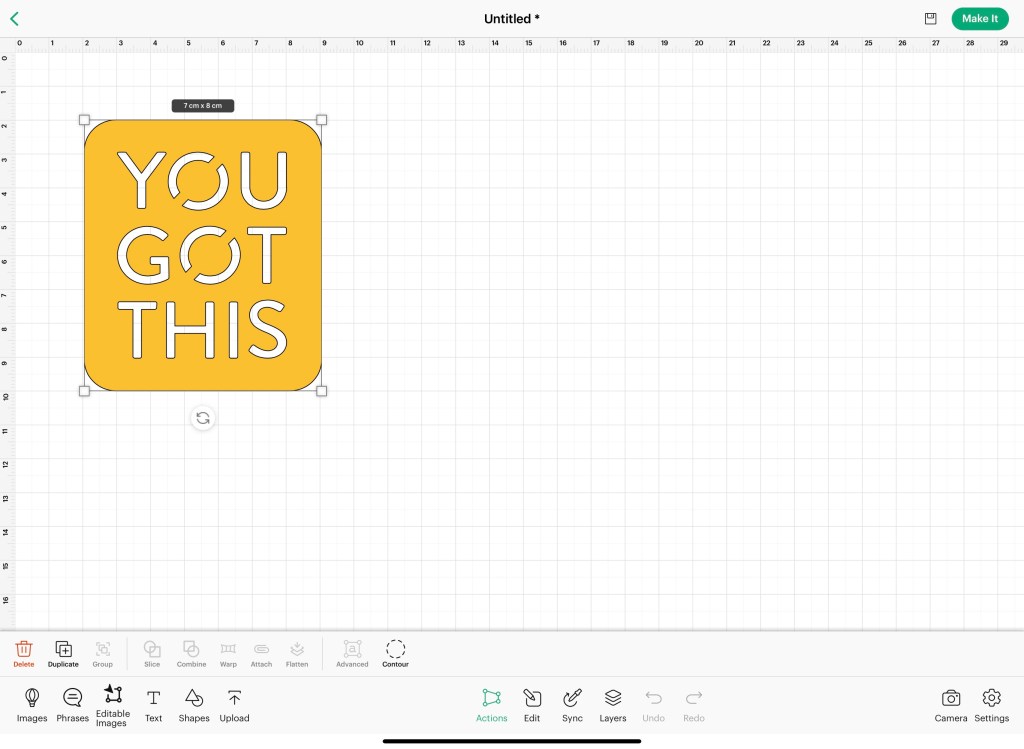
When I am satisfied with the aspect ratio and am ready to start, I move to the upper right corner and press the MAKE IT-button. Select the type of mat and prepare the material for the cut.
For this type of project I would need a Standard Grip mat and HTV, together with a weeding tool. That’s it, easy!
Following the instruction on the load window, I check that my blade is inserted, load my mat with the HTV and press GO. The Cricut Joy will do its magic.
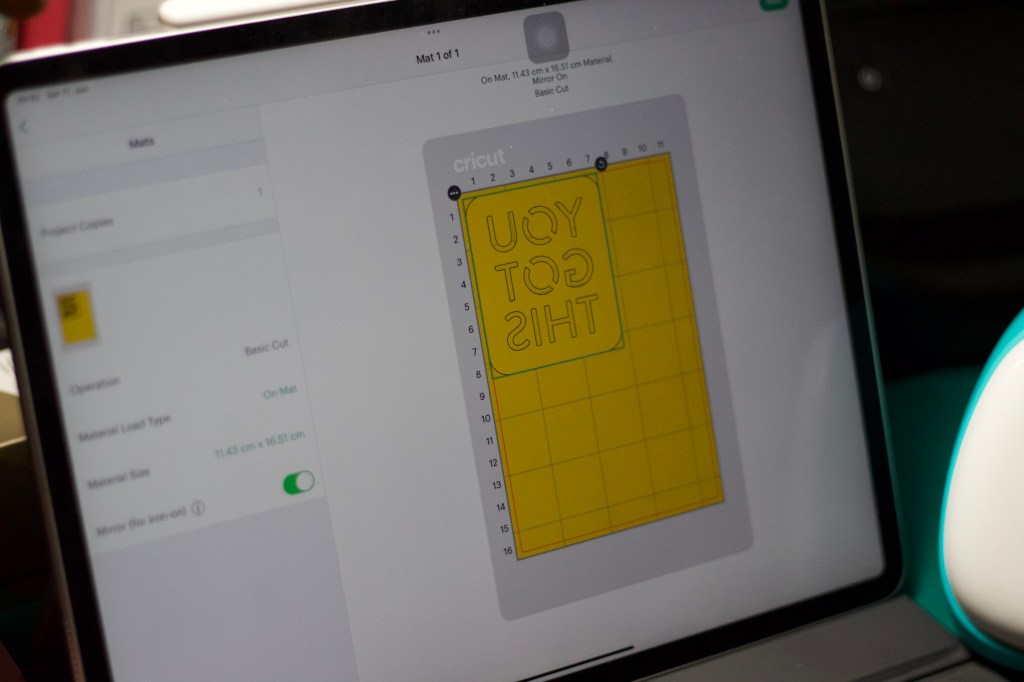

NOTE: For Iron-On project remember to mirror your project and make sure that your HTV (Heat transfer vinyl) is loaded with the shiny side on the mat.
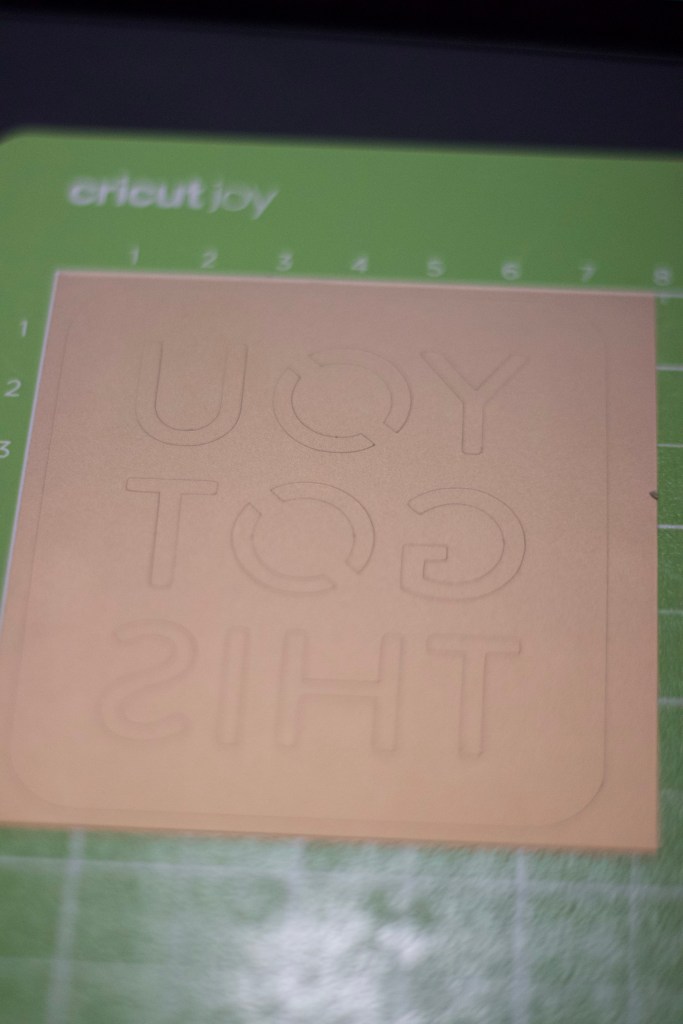
Once the cut is done, unload the project from the mat by peeling the mat from the material. This ensure the project will hold its shape. Now is time for weeding, using a weeding tool, carefully remove the excess material and recycle it. Our Iron-on patch is ready to be heat transferred.

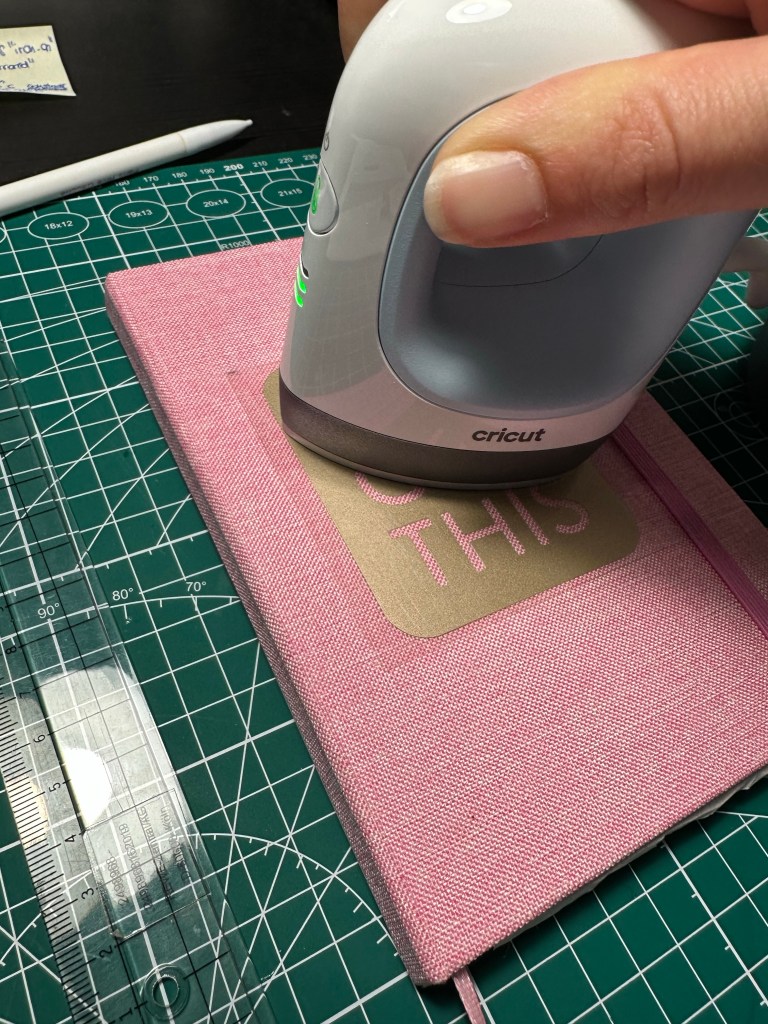
Since this was my first HTV project with the EasyPress, I consult the Heat guide on Cricut website for the right temperature setting and exposure time for my EasyPress mini. For this polyester cover and using the Cricut Smart Iron-On, the following steps were suggested:
- preheat surface for 5 sec
- set the EasyPress mini to medium heat
- heat the project for 25 sec with constant movement and firm pressure
- flip and press for 15 s (this step was skipped since I was transferring onto a notebook cover)
- remove liner slowly when cool to touch
And so it is: easy notebook make over with Iron-On patch. Even a beginner crafter can achieve fantastic result without messing up.
Have you already worked with HTV? What is your experience? And the last project you made with Iron-on? Drop me a comment below, I’d love to hear from you. Happy Crafting!
Sending lots of love,
Lalla
